Prerequisites
Before you can configure and use Windsurf with Embedded Cloud, you must first do the following:- Install the Windsurf IDE (MCP integrations do not support extensions or plugins).
- Connect a data source to your Embedded Cloud account. See Sources for more information.
- Generate an OAuth JWT bearer token. Copy this down, as it acts as your password during authentication.
Connect Windsurf to the Embedded Cloud MCP
1
Open Cascade Code Chat Assistant, either by pressing CTRL+L or by clicking the button highlighted below.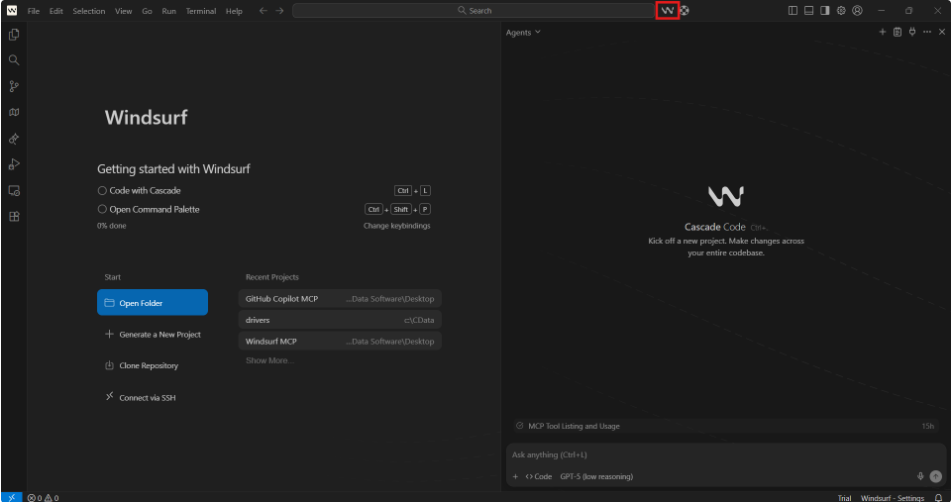
2
In Windsurf, open the MCP configuration file, 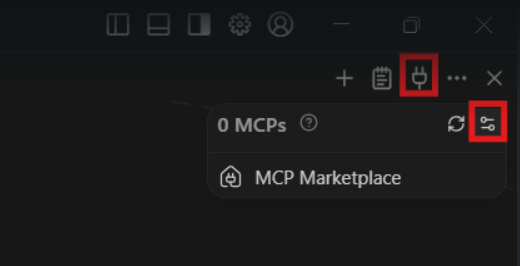
mcp_config.json, which is created during installation. The default path is C:\Users\<YourUsername>\.codeium\windsurf\mcpconfig.json. You can also open it directly from the IDE by clicking the MCPs button in the chat dialog, and then selecting the Config icon, as shown below:3
Copy and paste the following into the
mcp_config.json file. Replace the authorization header with the credentials obtained in the prerequisites.4
Start the MCP server by clicking the MCPs button in the chat dialog and clicking the Refresh button.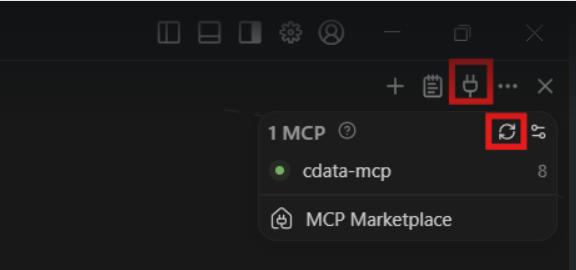
5
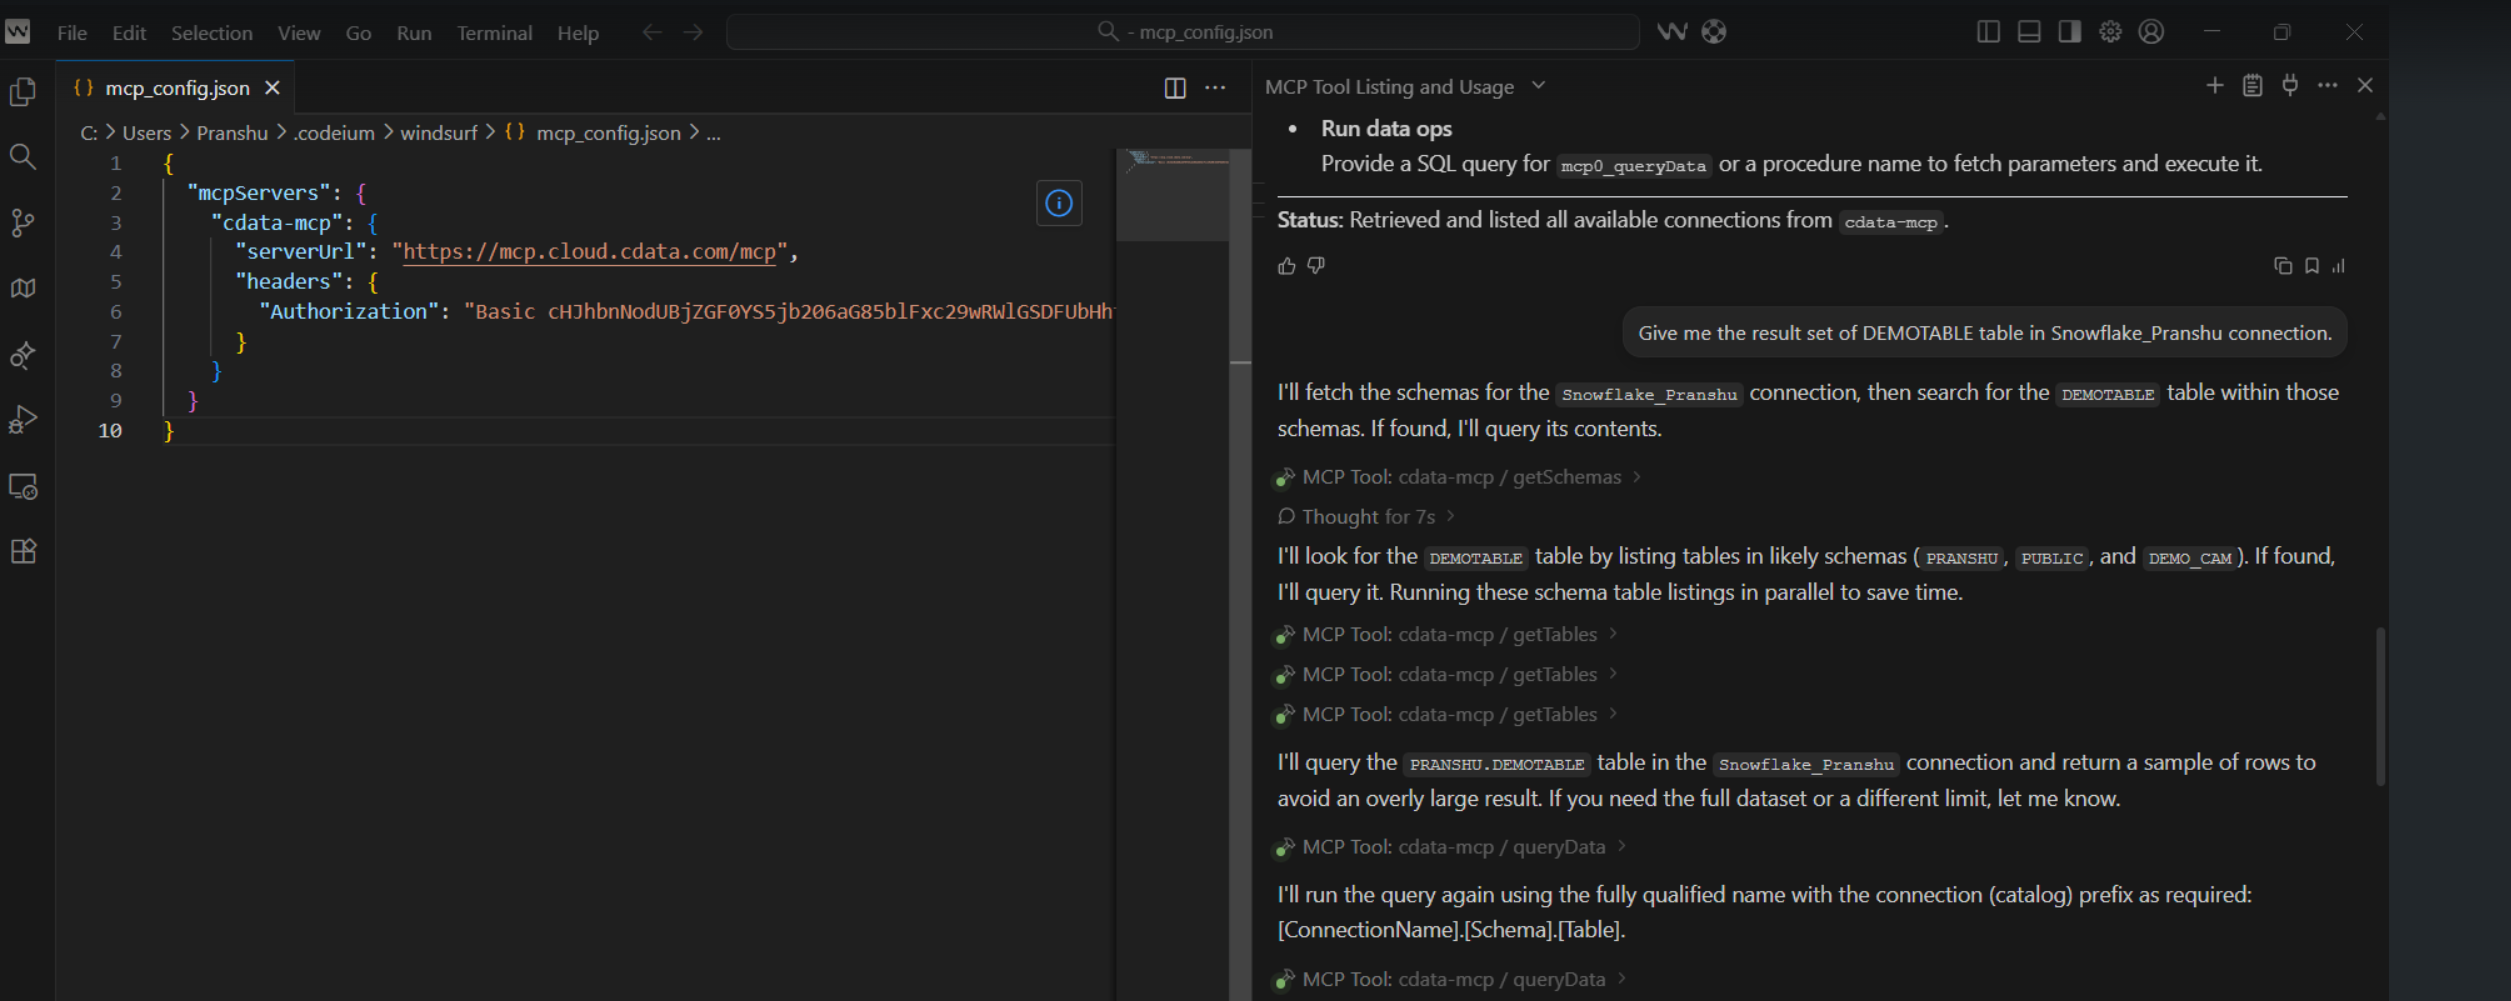
You can now chat with the assistant. Windsurf lists the available tools, the connections, and a result set of a given table of a given connection.