Prerequisites
Before you can configure and use Databricks with Connect AI, you must first connect a data source to your Connect AI account. See Sources for more information. You must also generate a Personal Access Token (PAT) on the Settings page. Copy this down, as it acts as your password during authentication.Connect to Connect AI
To establish a connection from Databricks to Connect AI, follow these steps.1
Download and install the Connect AI JDBC driver.
1
Open the Integrations page of Connect AI.
2
Search for JDBC or Databricks.
3
Click Download and select your operating system.
4
When the download is complete, run the setup file.
5
When the installation is complete, the JAR file can be found in the installation directory.
2
Log in to Databricks.
3
In the navigation pane, select Compute. Start any compute or create a new one.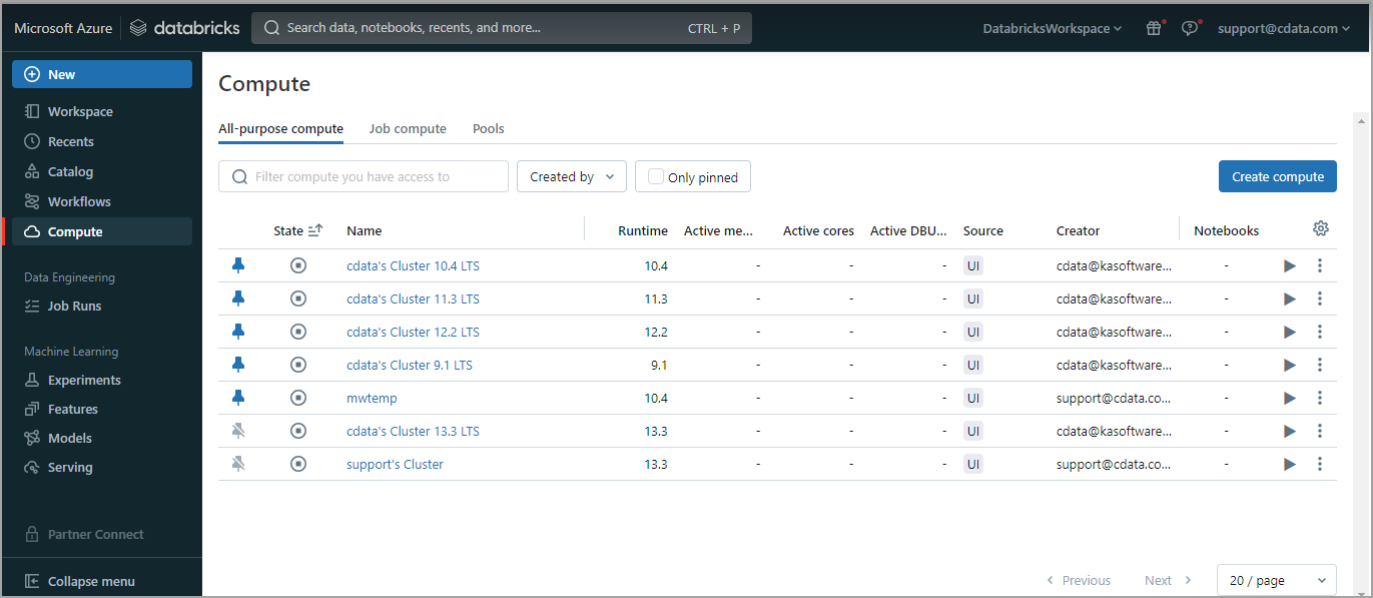
4
Once the compute is started, click the compute and then select the Libraries tab.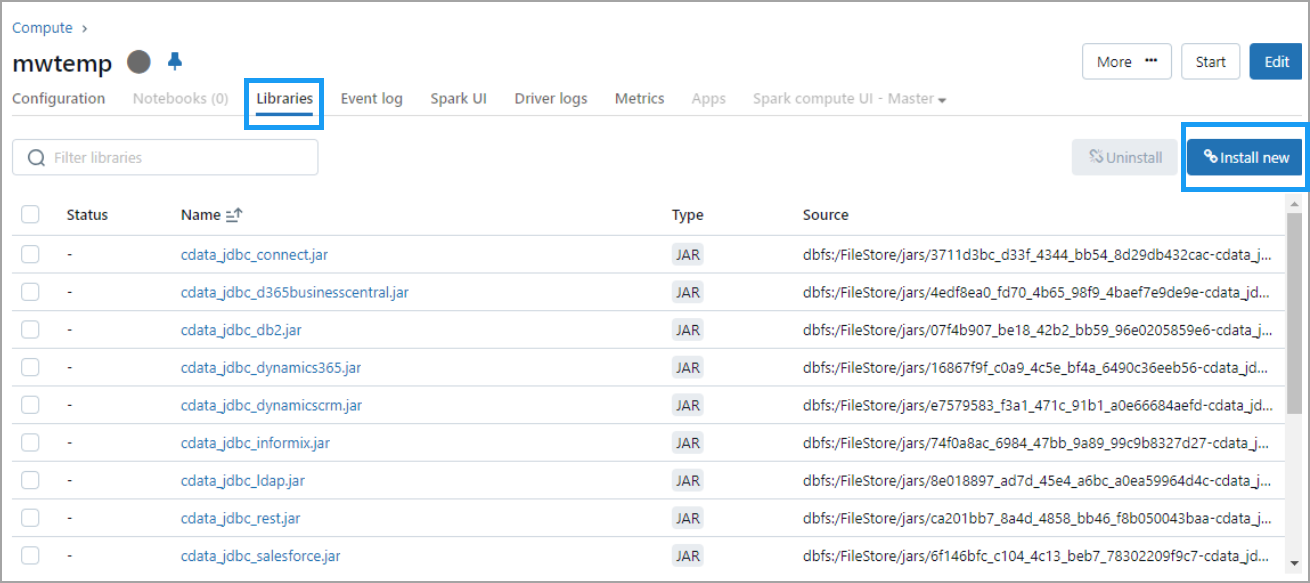
5
Click Install new. The Install library dialog appears.
6
Select DBFS. Then drag and drop the JDBC JAR file into the indicated area. The file has the name cdata.jdbc.connect.jar. Click Install.
7
You must now run three notebook scripts, one by one.
8
The first script is below. Change the following:
- Update
Userwith your Connect AI username. - Update
Passwordwith the PAT you generated in the prerequisites. - Update
Your_Connection_namewith the name of the data source you created in the prerequisites.
9
Run the first script.
10
From the menu on the right side, select Add cell below to add a second script. The second script is below. Change the following:
- Update
Userwith your Connect AI username. - Update
Passwordwith the PAT you generated in the prerequisites. - Update
Your_Connection_namewith the name of the data source you created in the prerequisites. - Update
YOUR_SCHEMA.YOUR_TABLEwith your schema and table, for example,PUBLIC.CUSTOMERS.
11
Run the second script.
12
Add a cell for the third script. The third script is below. Select the columns you want to display.
13
Run the third script.
14
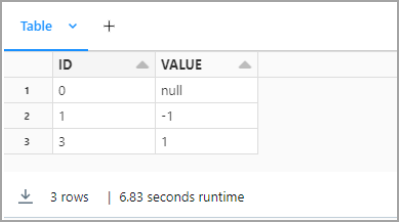
You can preview your data in Databricks.