Prerequisites
Before you can configure and use Windsurf with Connect AI, you must first do the following:- Install the Windsurf IDE (MCP integrations do not support extensions or plugins).
- Connect a data source to your Connect AI account. See Sources for more information.
- Generate a Personal Access Token (PAT) on the Settings page. Copy this down, as it acts as your password during authentication.
-
Base64-encode your Connect AI credentials in the following format:
Base64("email:PAT").
Connect Windsurf to the Connect AI MCP
1
Open Cascade Code Chat Assistant, either by pressing CTRL+L or by clicking the button highlighted below.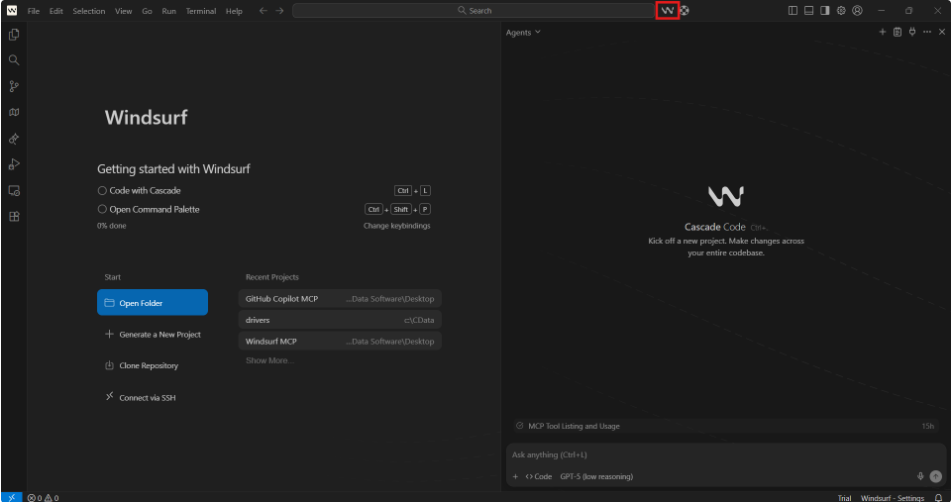
2
In Windsurf, open the MCP configuration file, 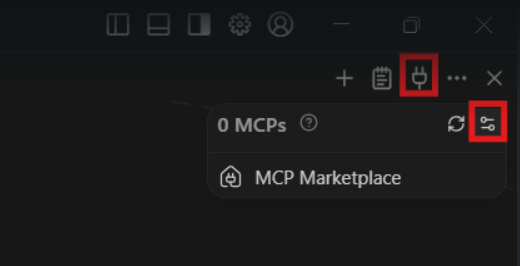
mcp_config.json, which is created during installation. The default path is C:\Users\<YourUsername>\.codeium\windsurf\mcpconfig.json. You can also open it directly from the IDE by clicking the MCPs button in the chat dialog, and then selecting the Config icon, as shown below:3
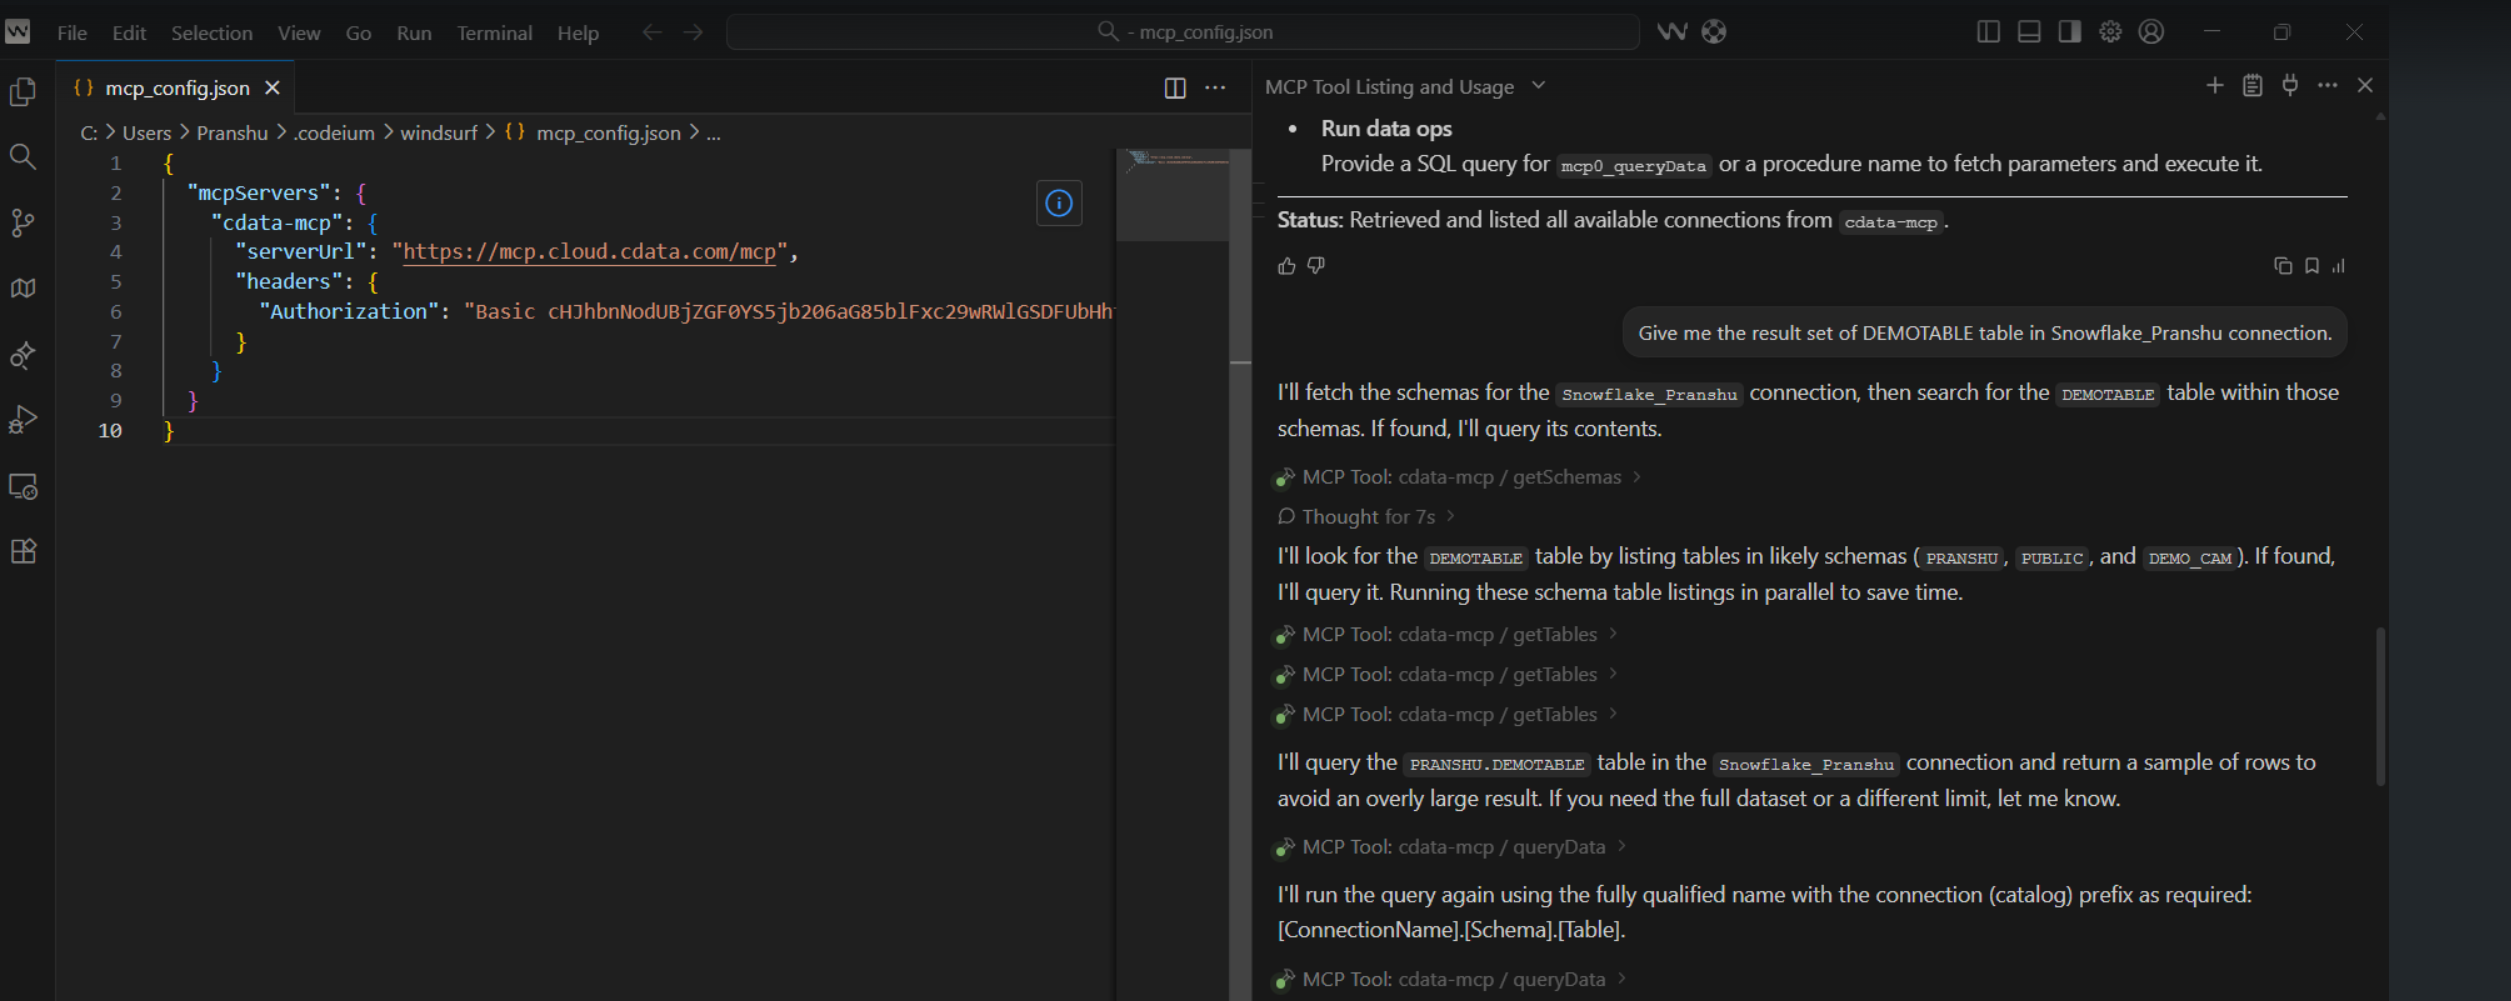
Copy and paste the following into the
mcp_config.json file. Replace the authorization header with the Base64-encoded credentials obtained in the prerequisites.4
Start the MCP server by clicking the MCPs button in the chat dialog and clicking the Refresh button.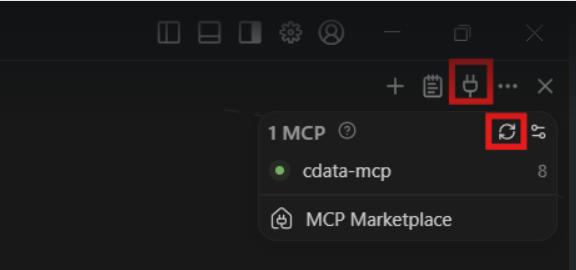
5
You can now chat with the assistant. Windsurf lists the available tools, the connections, and a result set of a given table of a given connection.