Prerequisites
Before you can configure and use Cloud Data Fusion with Connect AI, you must first connect a data source to your Connect AI account. See Sources for more information. You must also generate a Personal Access Token (PAT) on the Settings page. Copy this down, as it acts as your password during authentication.Connect to Connect AI
To establish a connection from Cloud Data Fusion to Connect AI, follow these steps.1
Download and install the Connect AI JDBC driver.
- Open the Integrations page of Connect AI.
- Search for JDBC or Cloud Data Fusion.
- Click Download and select your operating system.
- When the download is complete, run the setup file.
- When the installation is complete, the JAR file can be found in the installation directory.
2
Log in to Cloud Data Fusion.
3
Click the green ”+” in the top right to add an entity.
4
Under Driver, click Upload.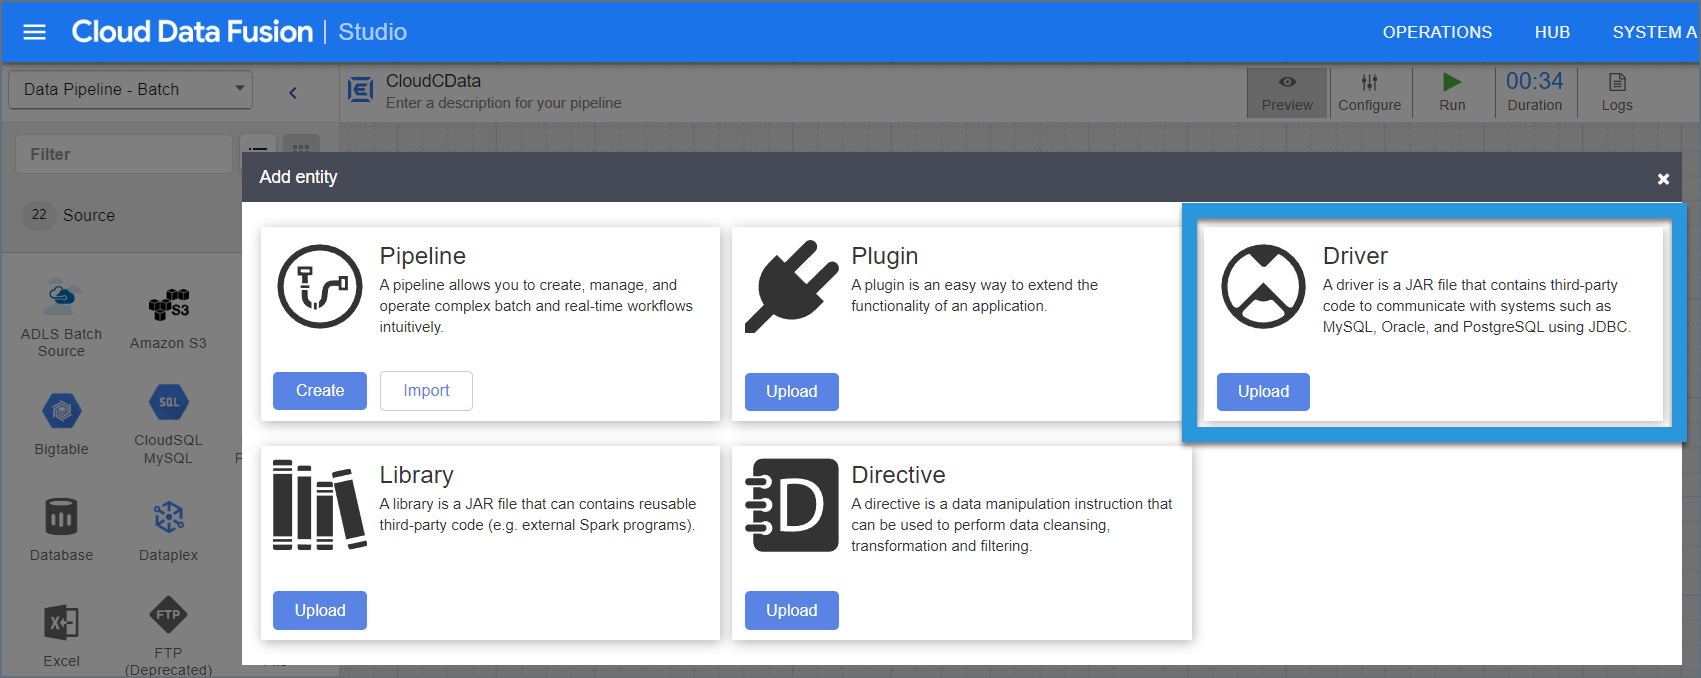
5
Upload the Connect AI JDBC driver.
6
Enter the driver settings.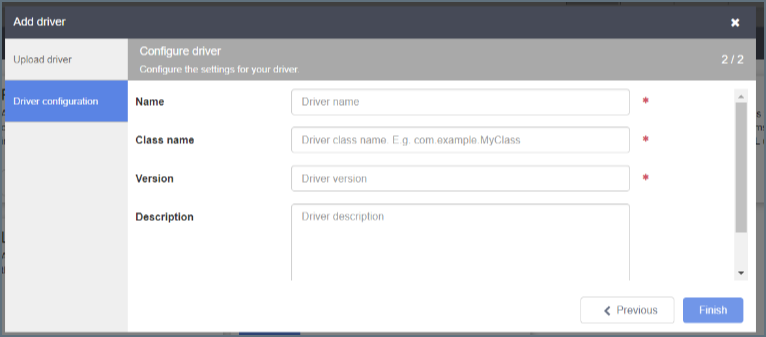
- Name—the name of the driver
- Class name—enter cdata.jdbc.connect.ConnectDriver
- Version—the driver version
- Description—(optional) a description for the driver
7
Click Finish.
8
Enter source configuration settings.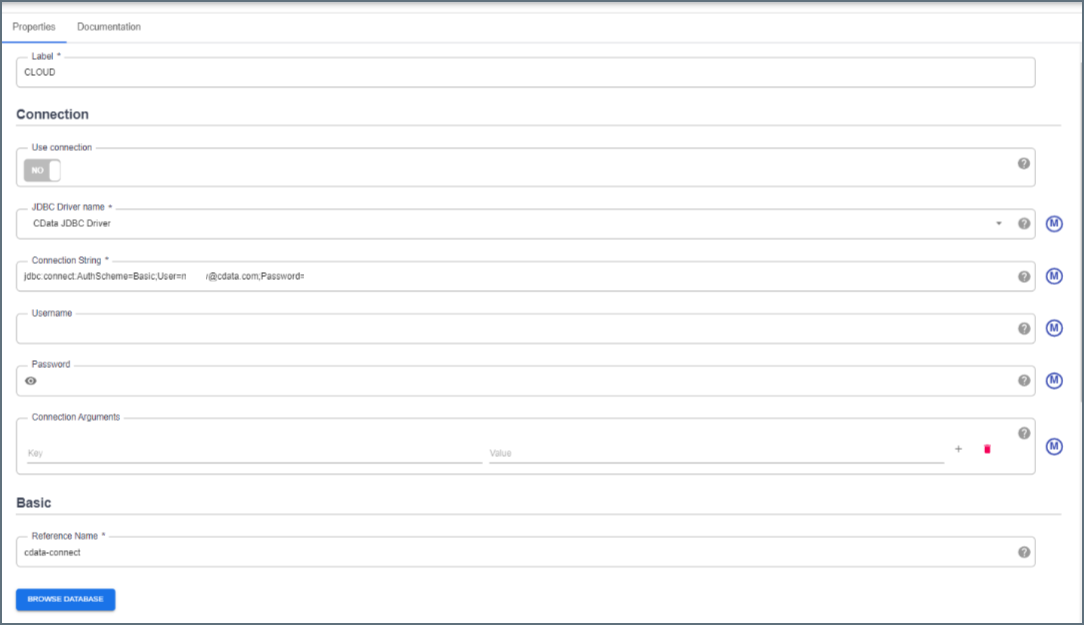
- Label—to identify the connection
- JDBC driver name—enter the JDBC driver name. This is to identify the driver configured in Step 6.
- Connection string—the JDBC connection string. It is formatted like
jdbc:connect:AuthScheme=Basic;User=[User];Password=[Password];. Fill in this string with the following parameters. - User—enter your Connect AI username. This is displayed in the top-right corner of the Connect AI interface. For example, test@cdata.com.
- Password—enter the PAT you generated on the Settings page.
9
Click Validate in the top right.
10
If the connection succeeds, you can manage the pipeline by editing it through the UI.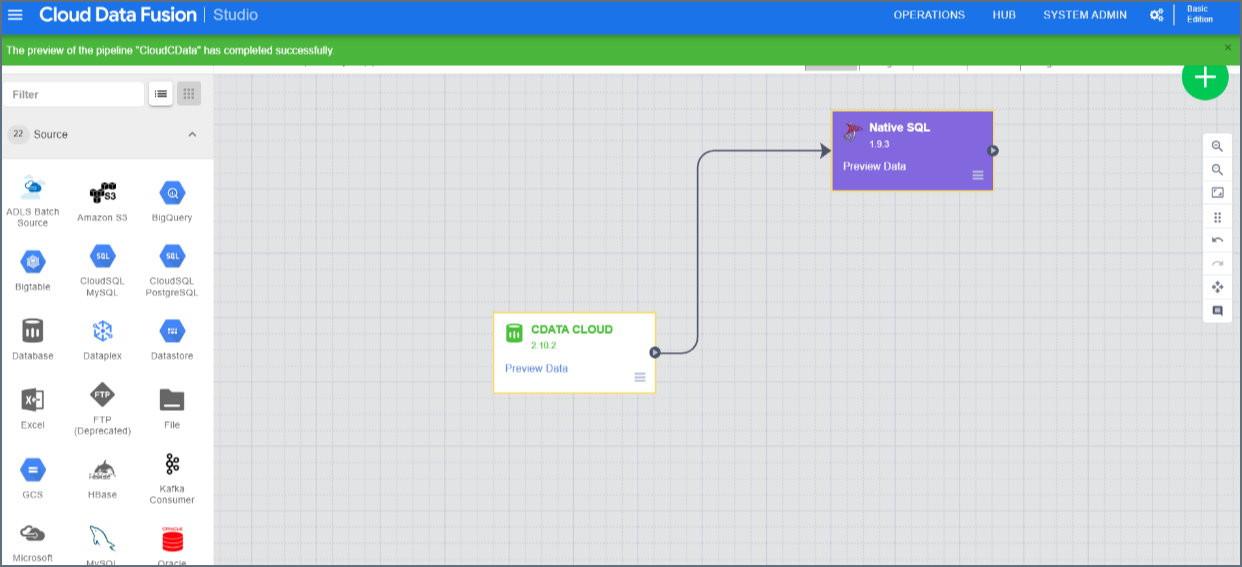
Troubleshooting
Please be aware that there is a known issue with Cloud Data Fusion whereint types from source data are automatically cast as long.