
- Connection Name—the user-defined name of the connection.
- Data Source—the data source type of the connection, along with whether the data source supports custom reports.
- Status—The status of the connection, which can be one of the following:
- Authenticated—the connection to the data source is successful.
- Not Authenticated—the connection was created in Connect AI, but is not successfully connected to the data source. You can return to the connection’s edit screen to authenticate the connection. Note that Query users need to contact an administrator to authenticate a connection.
- Conditional—the connection is conditional based on the global settings and tables added to the connector. This occurs with the API connector.
- Last Modified—the date and time a user last modified the connection.
Add a Connection
To add a new connection, complete the following steps:1
On the Sources page, click Add Connection. This action displays the Add Connection dialog.
2
Select a data source from the list in the dialog, or search for a connection by name.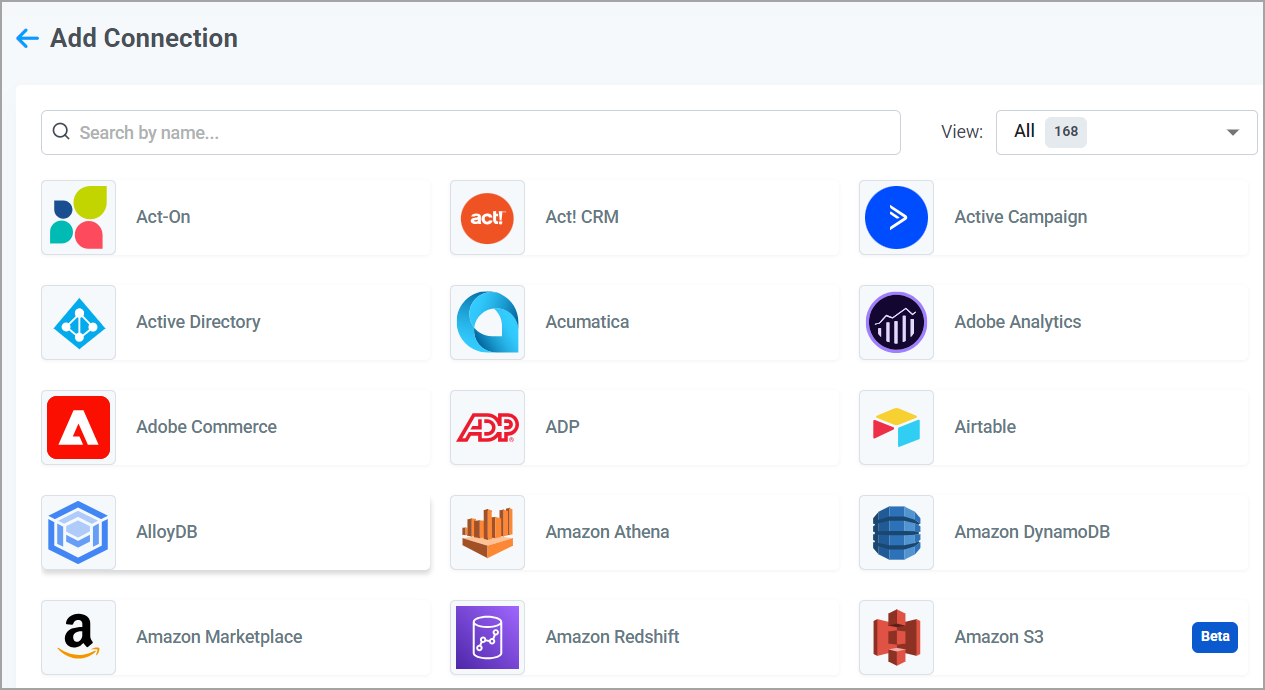
1
Configure the connection according to the instructions for the data source. The instructions for setting up the connection appear in the right pane of the configuration page, in the Documentation tab.
2
Click Save and Test.
If you attempt to modify or delete a connection and Connect AI finds a cached job from the current connection, you are prompted with a warning. You can choose to cancel or continue with the changes. If you save the changes, Connect AI clears the cached data from the current connection.
Query users need to contact an administrator of the account to have a draft connection authenticated.
Assign Permissions
When you create or edit a connection, the Permissions tab displays a list of available users and allows you to assign permissions to each one. Permissions are described in the list below:- Select: Enables you to select rows from tables in a connection.
- Insert: Enables you to insert rows into tables of a connection.
- Update: Enables you to update rows in tables of a connection.
- Delete: Enables you to delete rows from tables in a connection.
- Execute: Enables users to execute stored procedures in a connection.
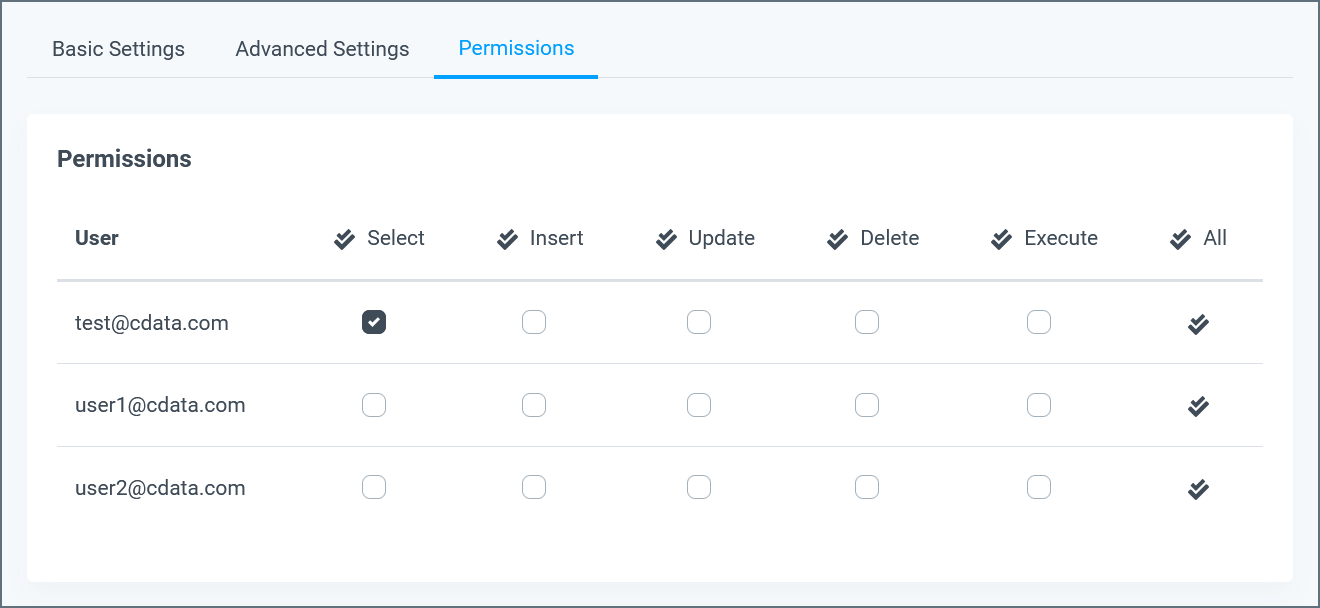
- Click an individual box in the table to toggle that permission for a single user.
- Click the double check mark at the top of a table column to toggle that permission for every user.
- Click the double check mark at the right side of the table to toggle all permissions for a single user.
- Click the double check mark that is labeled All in the top-right corner of the table to toggle all permissions for all users.
Configure Custom Reports
Some data sources support custom reports, which allow you to configure pre-defined reports that you can query as views within your connections. Each report has a unique set of required inputs, and you provide these inputs when you configure the report in your Connect AI account. Custom reports are generally useful in two types of scenarios:- For ad or analytics data sources, they can be used to show aggregated reports on performance data by allowing you to pre-define a set of metrics and dimensions.
- Other types of data sources let you pre-define parameters to create data reports. For example, an accounting API might allow you to create a general ledger report in QuickBooks.
Create a Custom Report
If a data source supports custom reports, a Custom Reports tab appears on the connection settings page. Clicking this tab opens the custom reports interface, as shown below:
1
Click Add above the report table. A dialog appears with a list of the custom reports available for your chosen data source.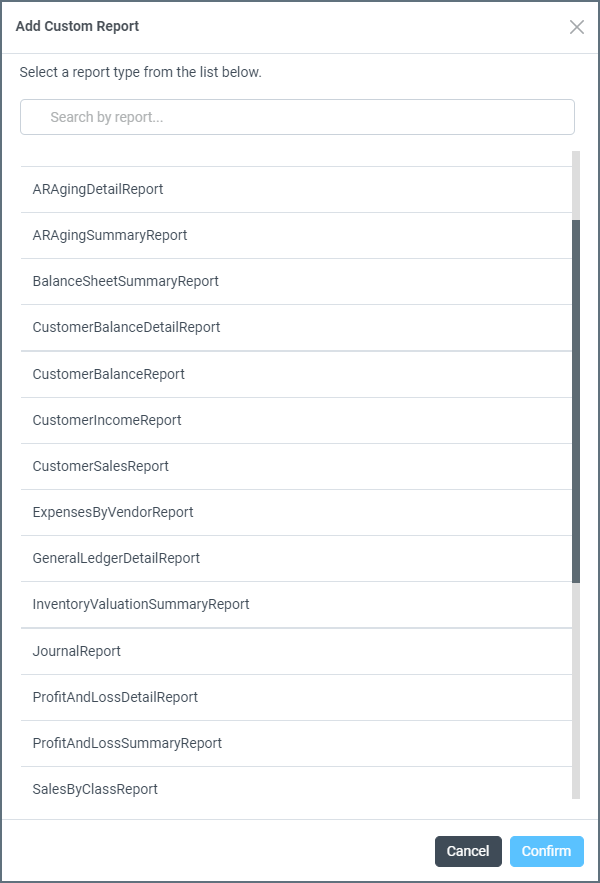
2
Select the report you want to use and click Confirm. A list of required and optional fields appear for the custom report.
3
Enter the requested information, and then click Save to save the custom report to your account.
Custom reports are not shared across multiple connections to the same data source. For example, if you have two separate connections to Adobe Analytics, both connections will have their own lists of custom reports.
Using a Custom Report
You can query saved custom reports by passing the name of the custom report in the table field for your query. For example, if you have a custom report called Customer Accounts List on your QuickBooks Online connection, you could select all of its results with this query:Editing a Custom Report
To edit an existing custom report, follow these steps:1
In the report table, find the report you want to edit.
2
Click the report name or type, or click the edit button.
3
In Edit Custom Report, add or change report parameters.
4
Click Save Changes.
Duplicating a Custom Report from an Existing Report
To duplicate an existing custom report, follow these steps:1
In the report table, find the report you want to duplicate.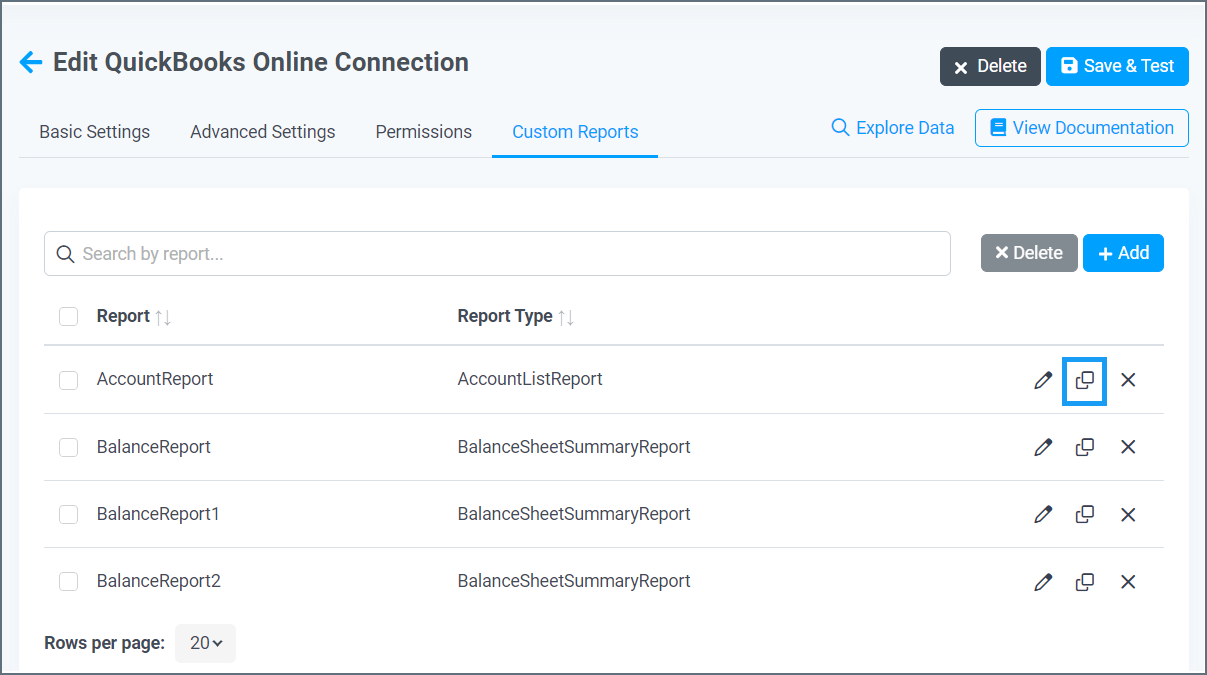
2
Click the duplicate button. Connect AI creates a duplicate custom report for the data source with a new name.
3
Edit the Report Name, if desired, and click Save.
Deleting a Custom Report
To delete an existing custom report, follow these steps:1
In the report table, find the report you want to delete.
2
Click the delete button to the right of the report. Alternatively, you can click Delete on the Edit Custom Report page.
3
Click Delete again in the dialog to confirm.